Viewing entries in
Tutorial

Gebチュートリアル

Gebチュートリアル

みなさんこんにちは。KEYチームの武永です。

先日とある学生さんから以下のようなメールを貰いました。

武永さんのGebのブログを読んでGebに興味が出てきて
実際に動作させてみたいと思ったのですが、 環境構築の仕方が分からず動かせていない状況です。
メールでもブログでもいいのでご助力いただけると幸いです。

詳しく状況を聞いてみると
「いつもはRubyを触っているが、何から手をつけていいのか分からない」
「私がどのような環境で動かしているのか興味がある」との事でした。
こういう連絡が来るとは思っていませんでした。

初歩的な情報でも参考になる方は多いのかなと思ったので今回は環境構築から 公式のサンプルコードの実装と説明の日本語訳 + 簡単なコードの説明を書いていこうと思います。
※英語は得意ではないので訳が100%正しいものとは言えないです。。。

使用する環境

  • Mac OS X Yosemite
  • Java8
  • IntelliJ IDEA14.1 Community Edition

環境構築

さて、さっそく環境構築を進めていきましょう。
とは言っても環境構築自体はGebはGroovyなので全く難しくありません。
※Javaのインストールは省略します。

IntelliJ IDEA14 インストール

既にIntelliJ IDEAがインストールされている方は読み飛ばして大丈夫です。

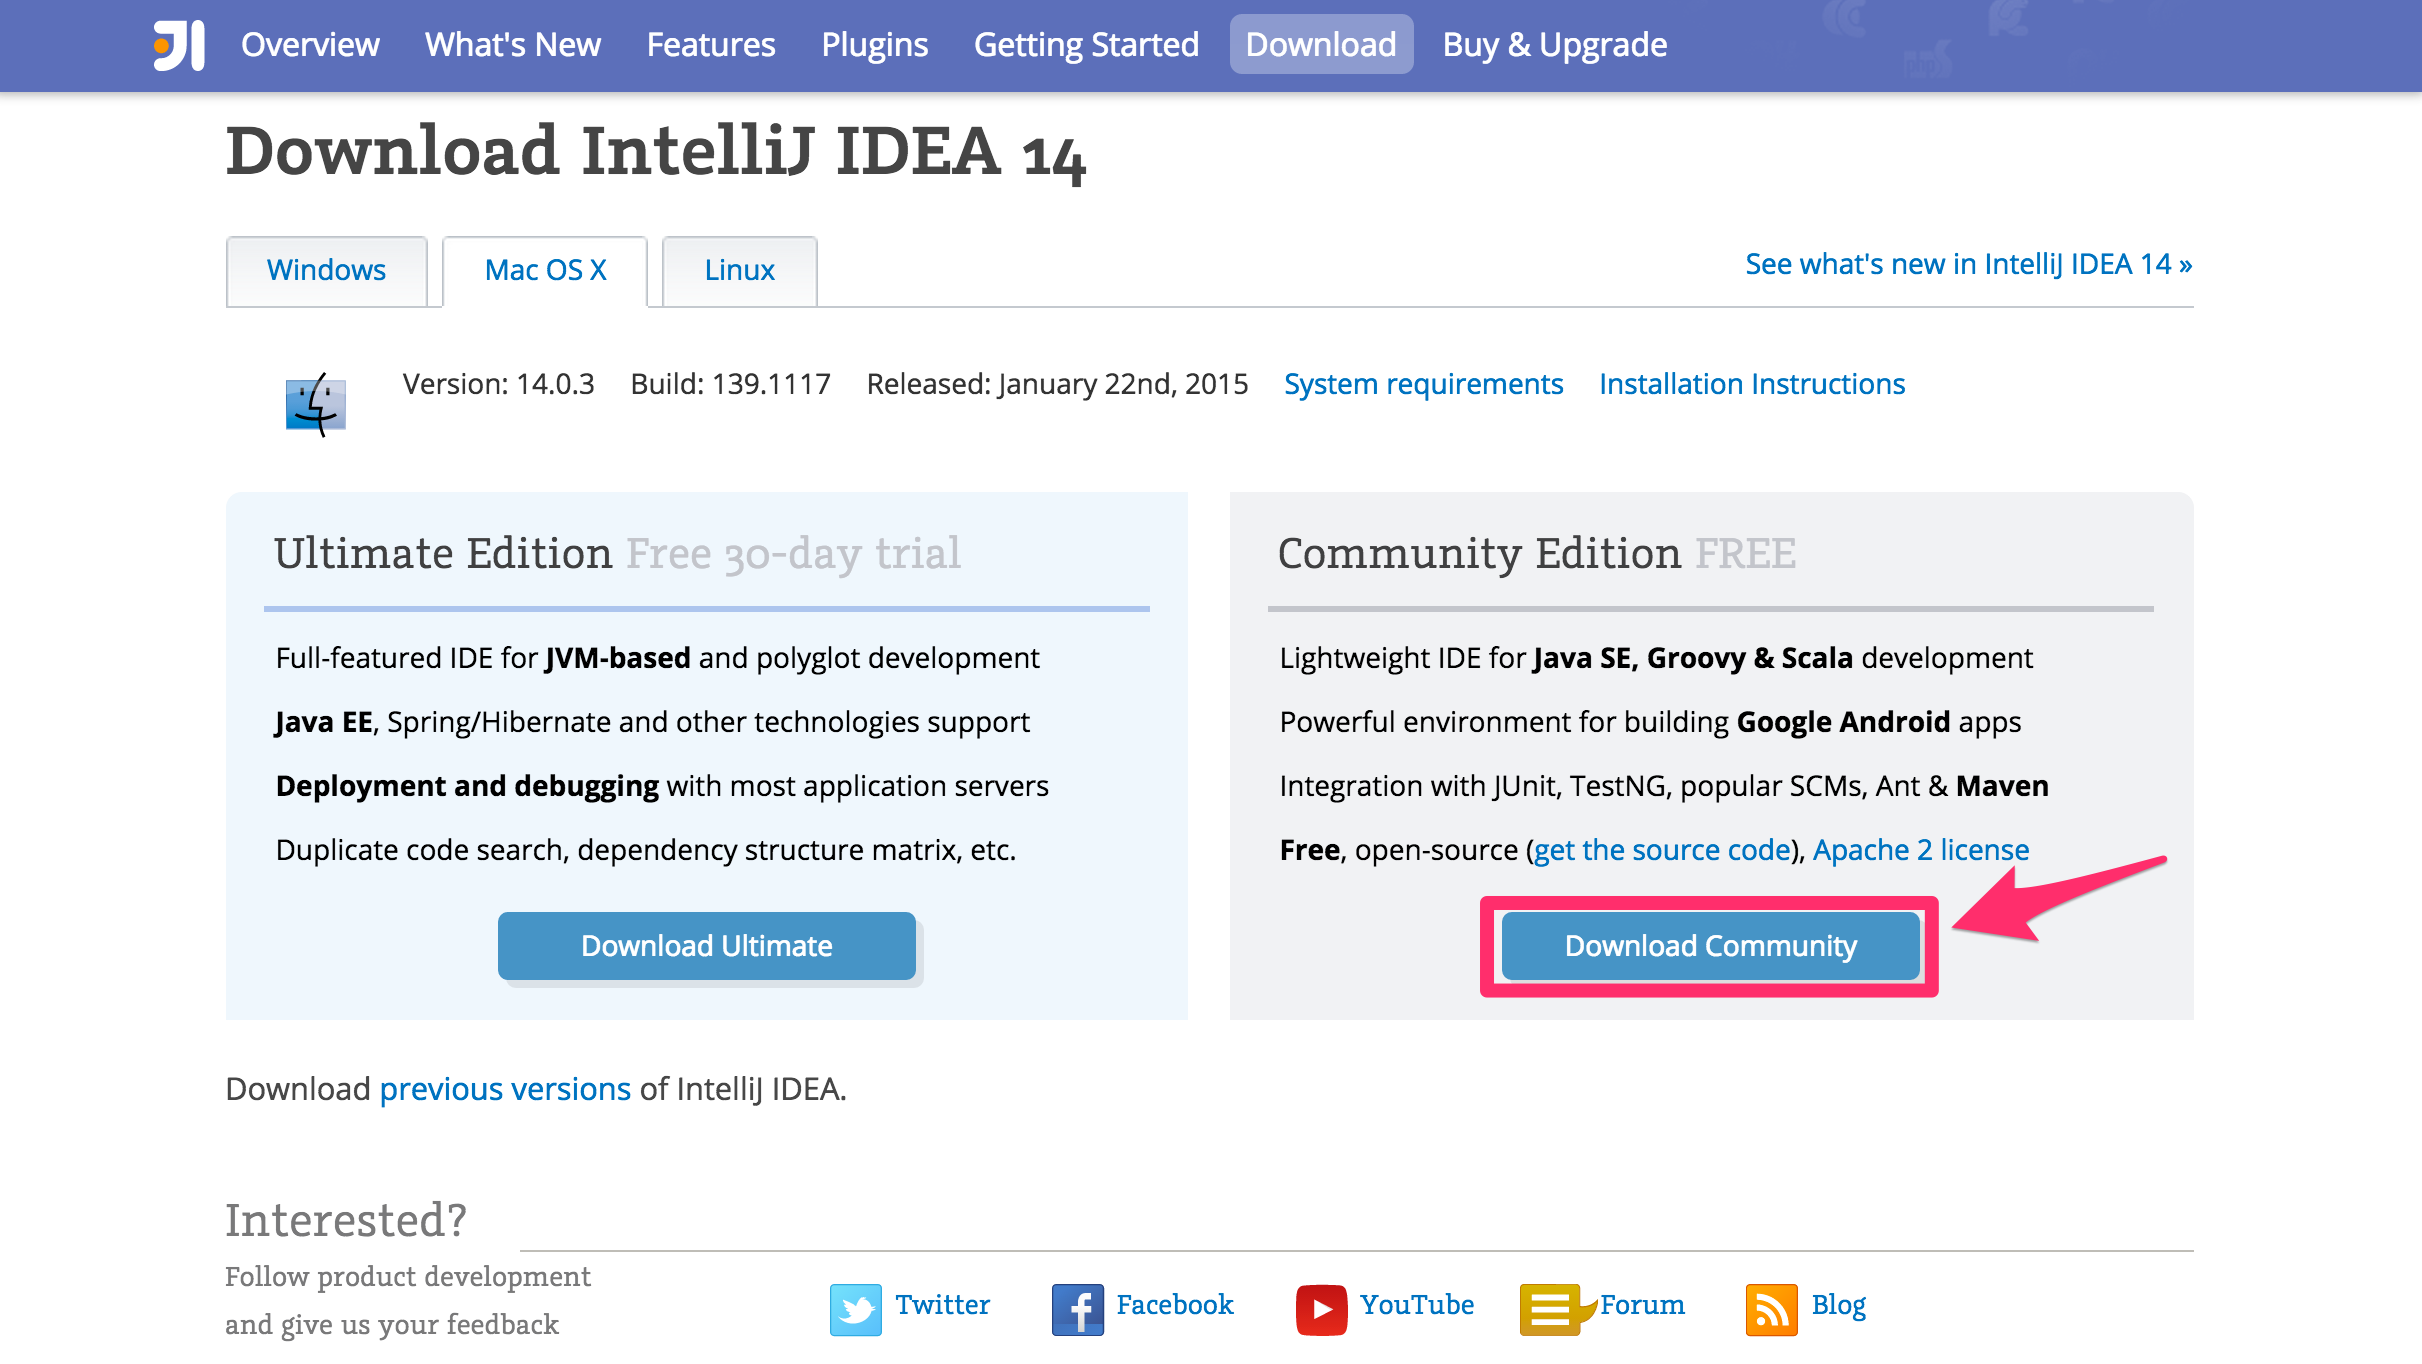
  1. https://www.jetbrains.com/idea/download/
    上記へアクセス
  2. 「Download Community」ボタンを押下
    「Ultimate Edition」でも問題はありません。
    ダウンロードが始まります。
  3. ダウンロードされた「ideaIC-14.1.4.dmg」を開く
    Intellij IDEA を アプリケーションへドラッグアンドドロップ

IntelliJ IDEAは標準でGroovyに対応しているので準備完了です。
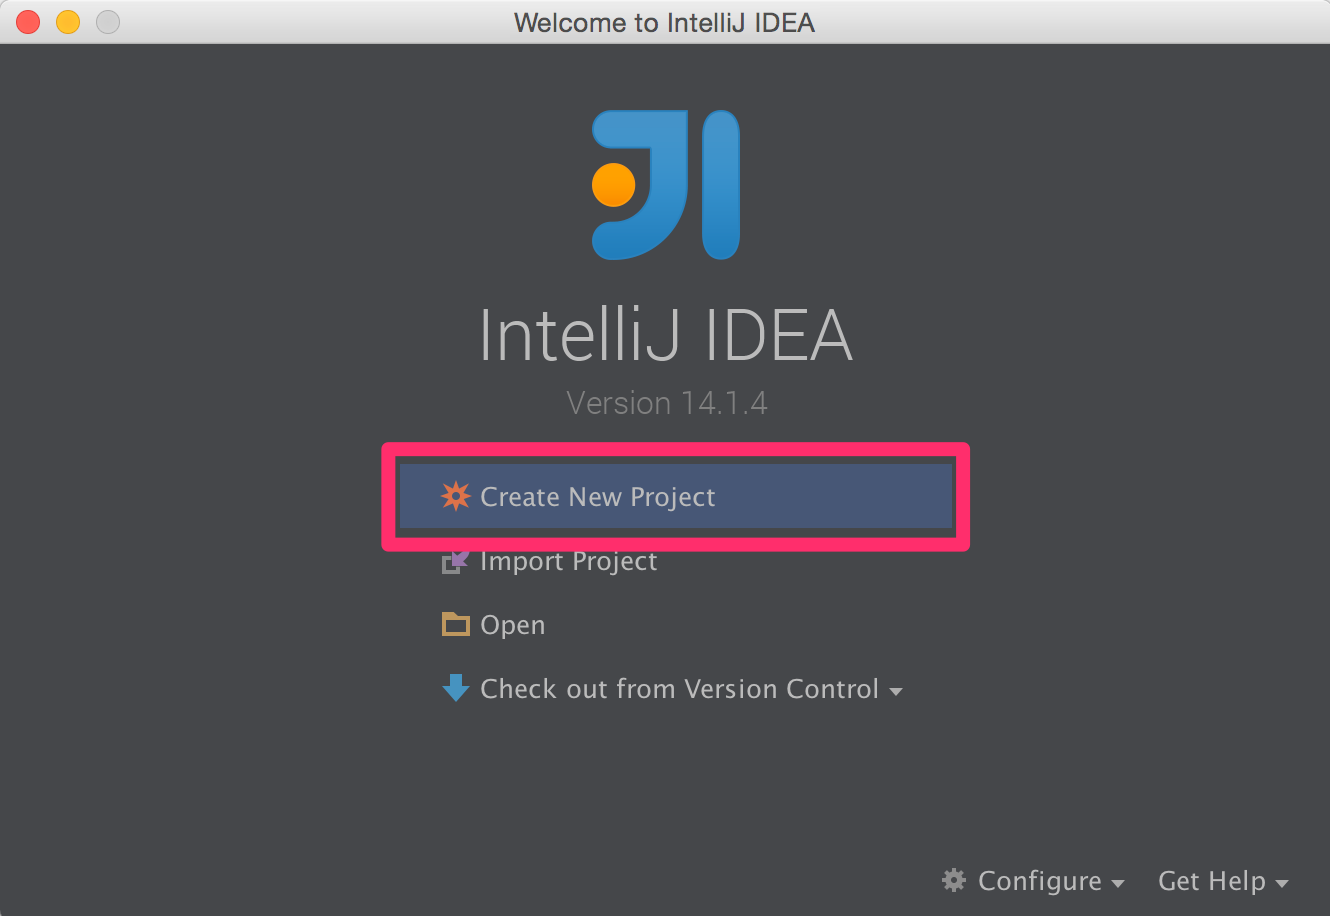
プロジェクト作成

  • new project → Maven → next

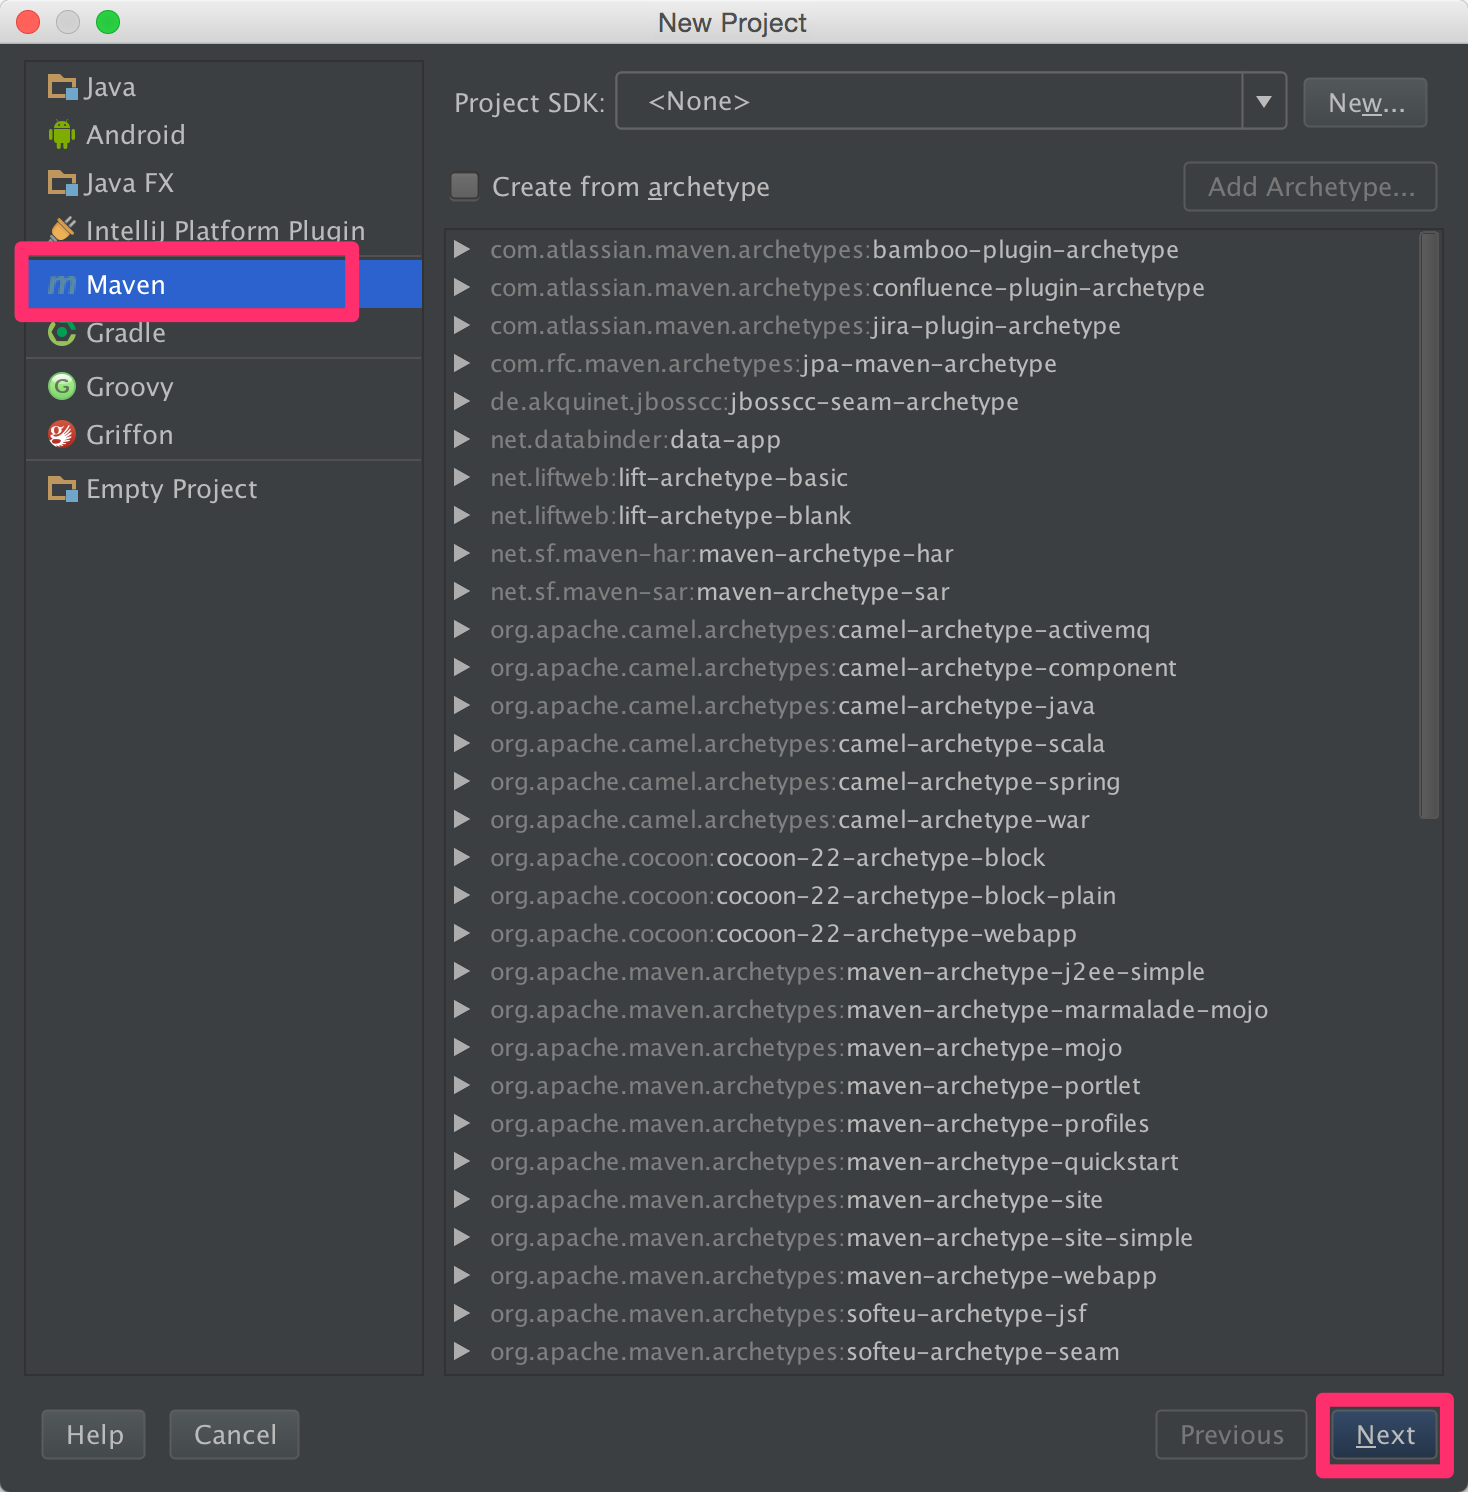
Project SDKが設定されていない場合は用意したJDKを選択しておいてください。 JDKの場所はデフォルトならば [/Library/Java/JavaVirtualMachines/jdk1.8.0_60.jdk/Contents/Home] 上記のようになっています。

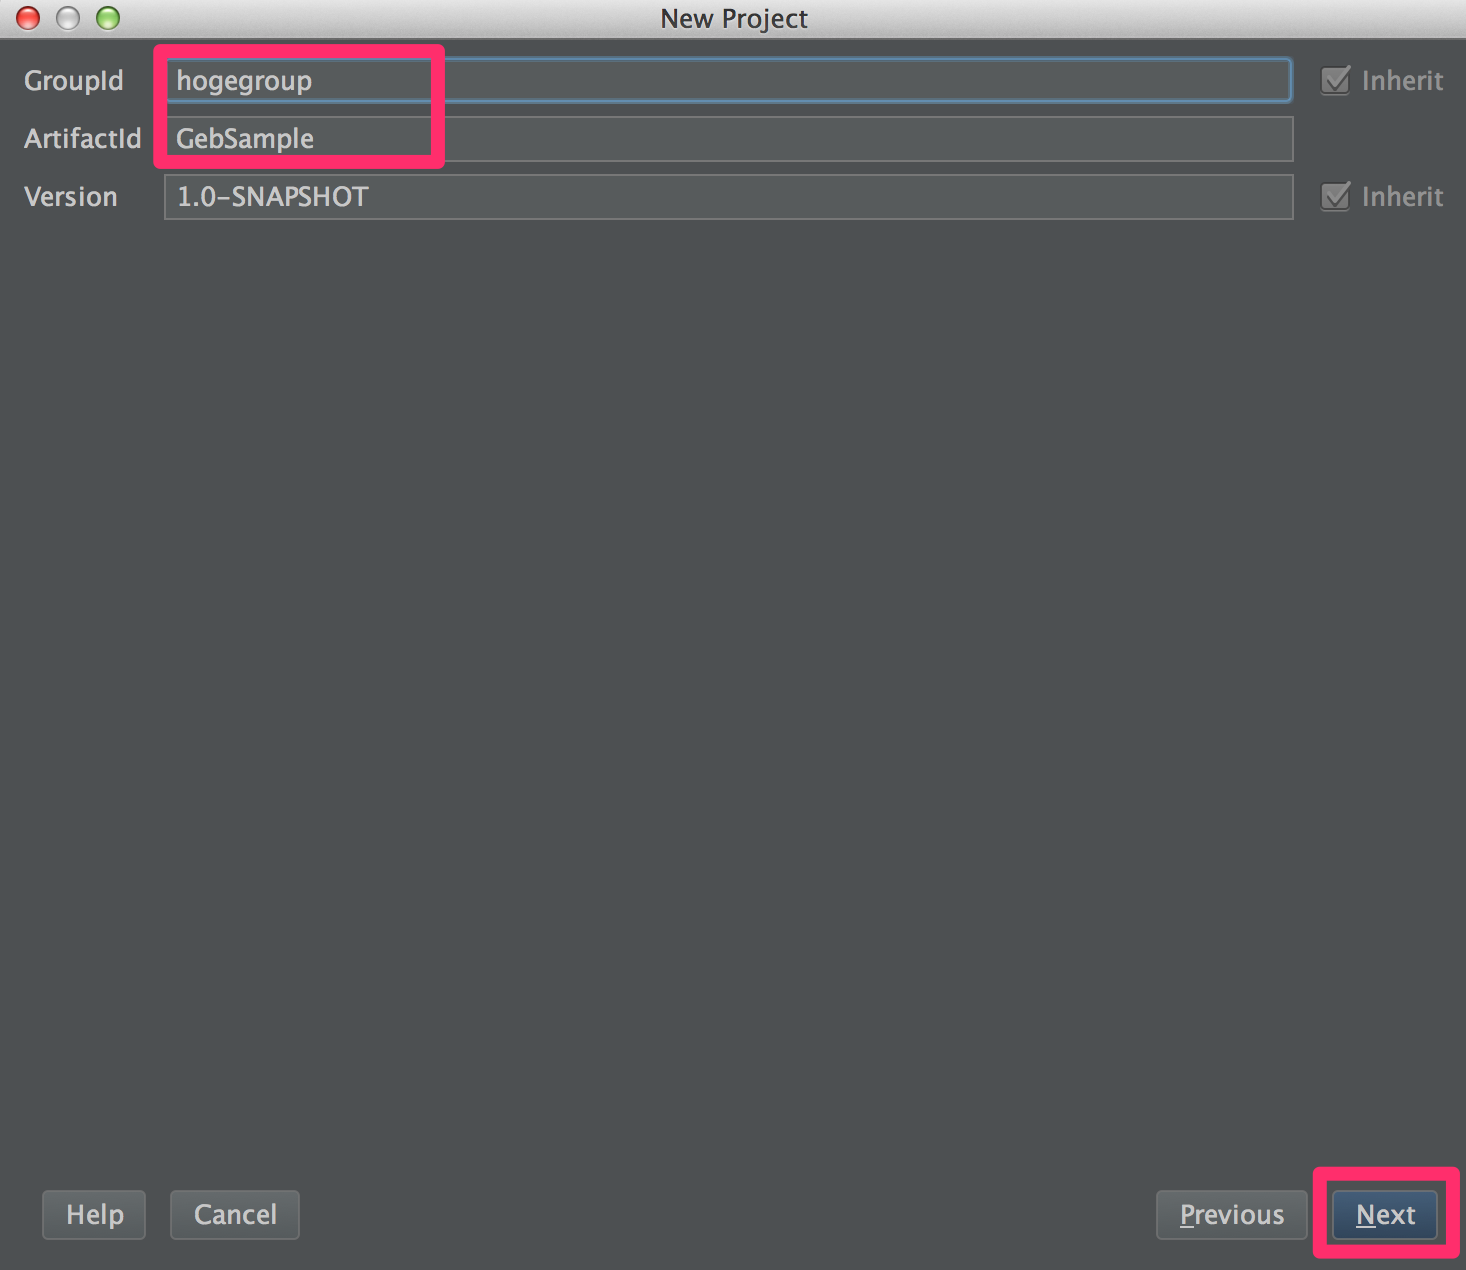
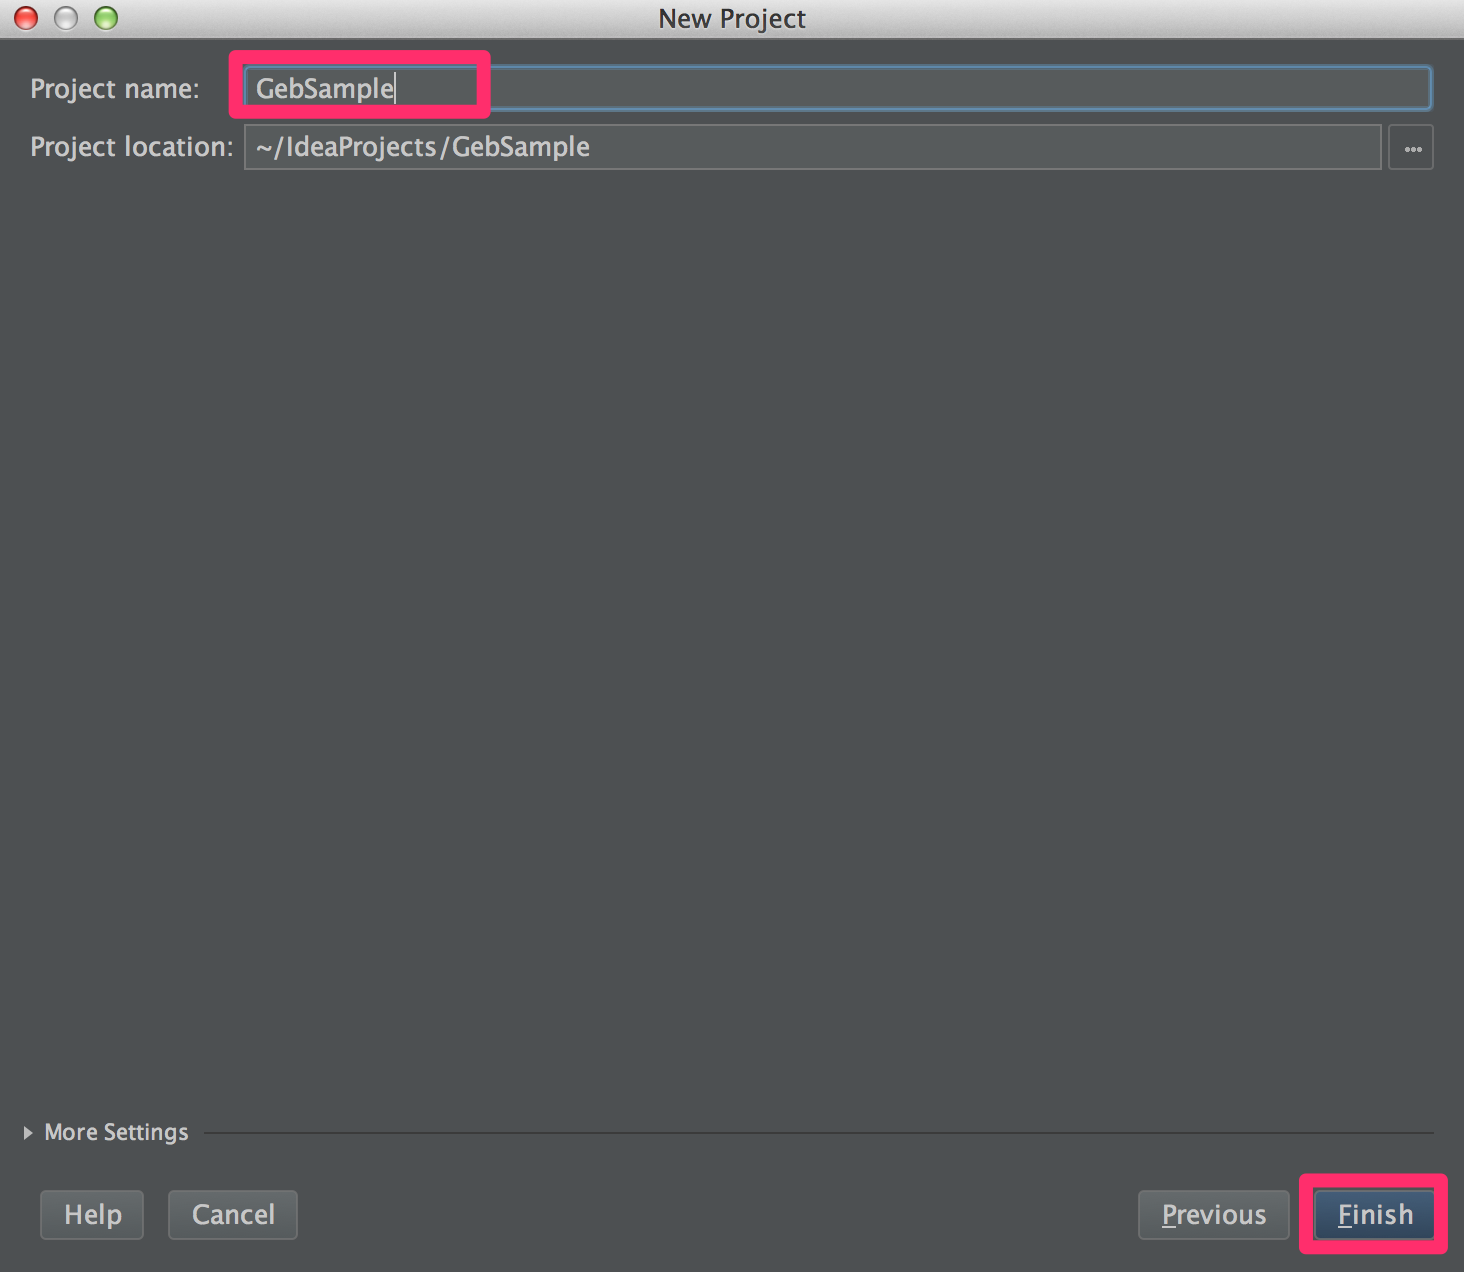
  • GroupIdとArtifactIdを入力 → next → ProjectNameを入力 → finish

pom.xmlの編集

pom.xmlを以下のとおりに編集します。

サンプルコード実装

Gebが動く環境は整ったので実装に入ります。
以下の様に「module」と「page」Packageを作成します。

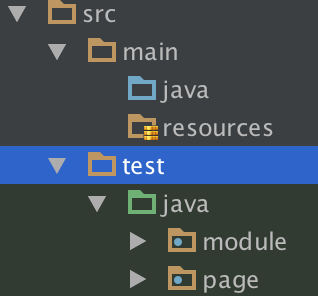
  • module配下に「SelectableLinkModule.groovy」を作成します。
  • module配下に「HighlightsModule.groovy」を作成します。
  • page配下に「GebHomePage.groovy」を作成します。
  • test直下に「GebHomepageSpec.groovy」を作成します。

以上でサンプル実装終了です。
では実際に動かしてみましょう。
「GebHomepageSpec」を左クリック → Run 'GebHomepageSpec' をクリックで実行できます。

実行結果がこちらの動画です。

最後に

まさか私のブログを読んでメールを送ってきてくれるとは思っていなかったのでメールを受け取った時には非常に驚きました。
個人的にはメールを送ってくれた方には是非会ってみたいなと思っています。
今回の記事でGebをとりあえず動かしてみようと思ってくれる人がいると幸いです。

Connecting SquirrelSQL To Apache Spark via Thrift Server JDBC

Introduction

Apache Spark is a great software project; a clustered computing environment that is well designed and easy to use. The attention it has been generating the last few years is well deserved.

Using Spark and SQL together has appeal for developers not accustomed to map, flatmap, and other functional programming paradigms. And allows developers to use SQL, a query language most are already familiar with.

Spark SQL can also act as a distributed query engine using JDBC. This is a useful feature if you plan to use Spark and SQL together, but the documentation falls a little short in places. This post is a first attempt to rectify that issue. It is a step by step guide to a fundamental method of connecting an SQL client to a standalone Spark cluster.

Setting up A Simple Spark System

The first step is to download and set up Spark. For the purposes of this post, I will be installing Spark on a Macbook. It should be the same steps in general on any operating system.

At the time of this writing I am downloading a Prebuilt Spark for Hadoop 2.6 and later.

Download this prebuilt instance of Spark. Also download SquirrelSQL, the sql client this tutorial will configure to connect to Spark.

Next we need to do a little configuring.

I added the following environment variables to my .bashrc:

# Spark local environment variables

export SPARK_HOME=CHANGEME!!! 
export SPARK_MASTER_IP=127.0.0.1 
export SPARK_MASTER_PORT=7077 
export SPARK_MASTER_WEBUI_PORT=9080 
export SPARK_LOCAL_DIRS=$SPARK_HOME/../work 
export SPARK_WORKER_CORES=1 
export SPARK_WORKER_MEMORY=1G 
export SPARK_WORKER_INSTANCES=2 
export SPARK_DAEMON_MEMORY=384m 
alias SPARK_ALL=$SPARK_HOME/sbin/start-all.sh 

You will need to change SPARK_HOME to the location where you unpacked the download. I configured the port that spark will use to commute, as well as the port for the webui. I configured it to use 1 core, two worker instances, and set some fairly strict limitations on memory.

I also added an alias to start all of them at once.

It is important to note that spark uses ssh to communicate with itself. This is a secure method of communication, but it is not common for a distributed system to talk to itself on a single machine. Therefore, you will probably need to do make some local changes to allow this on your machine. OSX has a Remote Login setting that allows this. Linux has several options. I don't recall what the Windows equivalent is. But to proceed beyond this first step, you will need to allow the workers to communicate via ssh.

Once you have your environment variables set, and they can communicate via ssh, we also need to add hive configuration. In order to connect with an SQL client, we're going to need to run a small server to act as a JDBC->Spark bridge. This server corresponds to the HiveServer2 (this is the Spark documentation wording. I really don't know what they mean by "corresponds to". I assume the Thrift JDBC/ODBC server is in fact HiveServer2).

In order to run the Thrift Server/HiveServer2 we will need to configure a location for the server to write metadata to disk.

Add the following file to $SPARK_HOME/conf/hive-site.xml

<configuration>

<property>
  <name>javax.jdo.option.ConnectionURL</name>
  <value>jdbc:derby:;databaseName=<my_full_path>/metastore_db;create=true</my_full_path></value>
  <description>JDBC connect string for a JDBC metastore</description>
</property>


<property>
  <name>javax.jdo.option.ConnectionDriverName</name>
  <value>org.apache.derby.jdbc.EmbeddedDriver</value>
  <description>Driver class name for a JDBC metastore</description>
</property>


<property>
  <name>hive.metastore.warehouse.dir</name>
  <value><my_full_path>/hive-warehouse</my_full_path></value>
  <description>Where to store metastore data</description>
</property>
</configuration>

Now, with the configuration out of the way, you should be able to run spark all. Via the alias I described above,

# > SPARK_ALL

On my Macbook, I am prompted for my password twice, once for each work I configured. You can configure ssh with keys to avoid this, but I'm not going to discuss that in this post.

To test that your Spark instance is running correctly, in a browser go to http://127.0.0.1:9080

Note that $SPARK_HOME/sbin/stop-all.sh will stop everything.

Adding Data

Spark provides a number of convenient ways to add data. Presumably one might do that via database, but for this demonstration we're going to do use the method described in the Spark documentation.

We will use the data provided here

# > cd $SPARK_HOME

# > bin/spark-shell

scala> val dataFrame = sqlContext.jsonFile("path/to/json/data") scala> dataFrame.saveAsTable("tempdepth")

Storing this data as a table will write metadata (ie, not the data itself) to the hiveserver2 metastore that we configured in an earlier step. The data will now be available to other clients, such as the SQL client we're about to configure.

You can close the spark shell now, we're done with it.

Run the Thrift Server

So now we have a running Spark instance, we have added some data, and we have created an abstraction of a table. We're ready to set up our JDBC connection.

The following is reasonably well documented on the spark website, but for convenience:

# > $SPARK_HOME/sbin/start-thriftserver.sh --master spark://127.0.0.1:7077

You should see a bunch of logging output in your shell. Look for a line like:

"ThriftCLIService: ThriftBinaryCLIService listening on 0.0.0.0/0.0.0.0:10000"

Your thrift server is ready to go.

Next, we will test it via beeline.

# > $SPARK_HOME/bin/beeline
beeline> !connect jdbc:hive2://localhost:10000

This will prompt you for your password and username, you can use your machine login name and a blank password.

The resulting output should say "Connected to: Spark Project Core".

Now you know you can connect to spark via JDBC!

Install a Client

If you haven't already done so, download SquirrelSQL.

First, you will need to add the JDBC driver. This is the Hive driver, and to get that you can either download hive, or use the two jars I have provided in my github repo. hive-cli and hive-jdbc are the required. As are some classes in the spark-assembly jar. Add those to the Extra Classpath and you should be able to select the HiveDriver as the image below describes.

Save this driver.

And finally we will create a connection alias. Give the alias a name, select the driver you just created, and the URL should look like the image below.

Once you have created the alias you can click the Test button to test your connection. Hopefully you are successful!

Once you connect, you should be able to find the table you created earlier, and query via SQL.